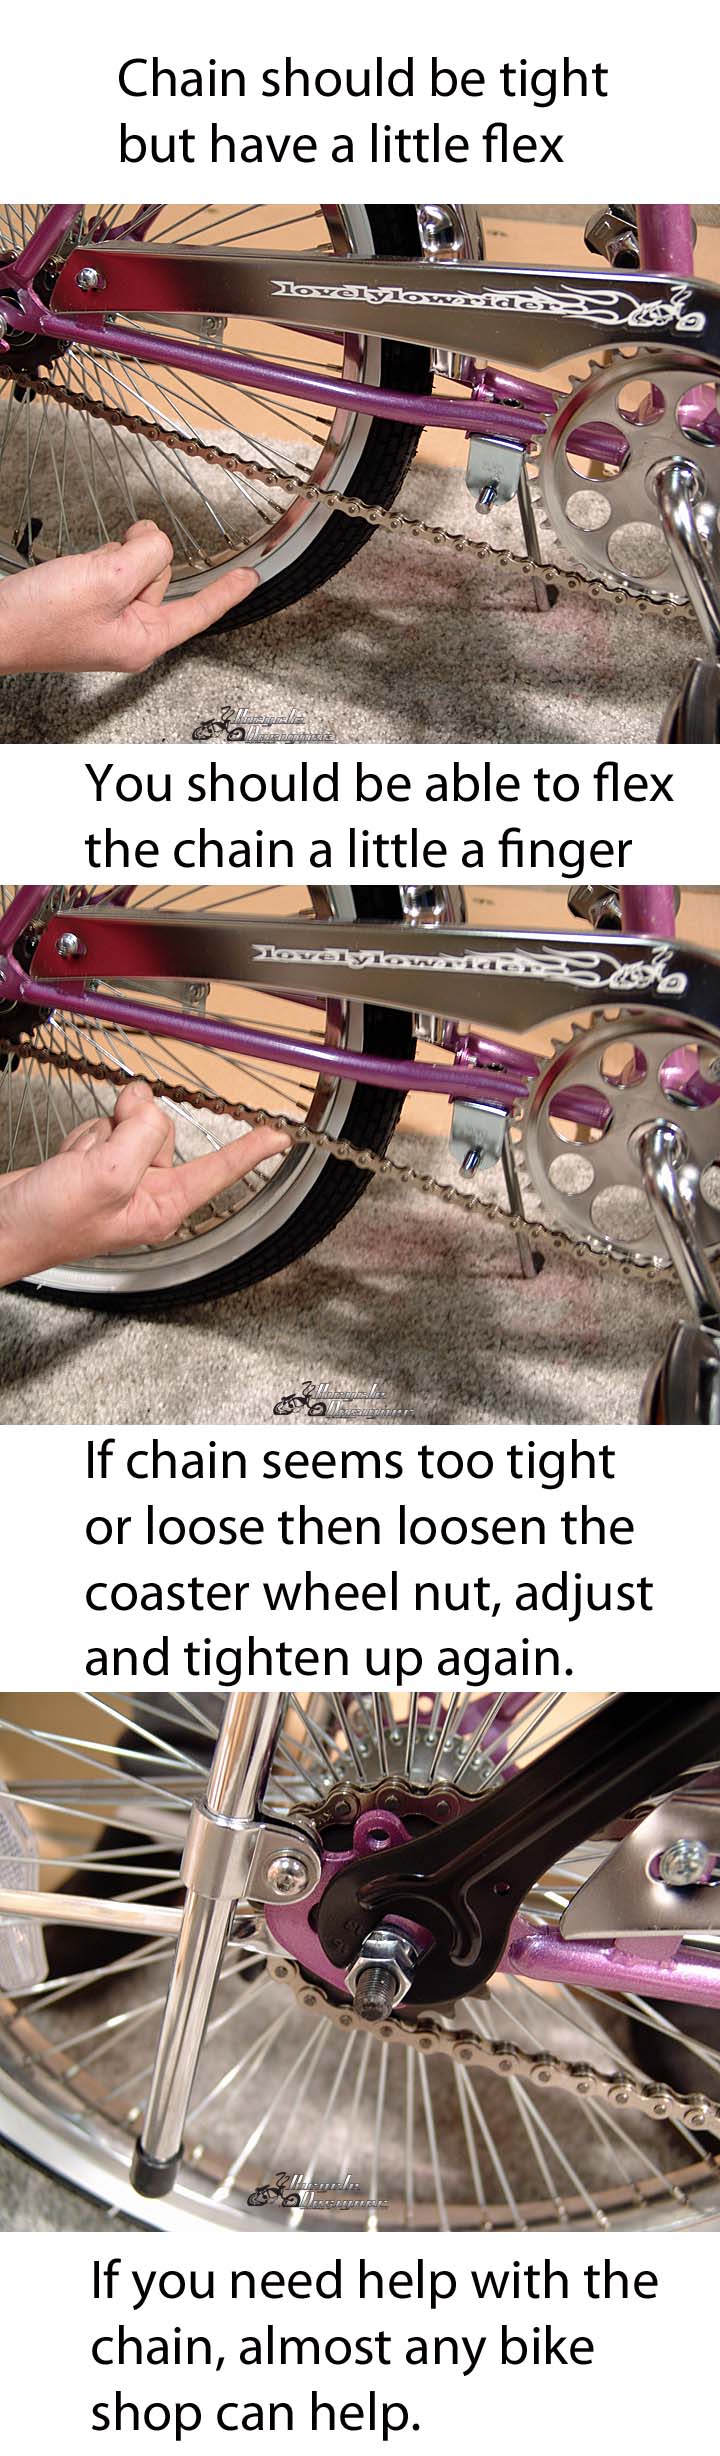
ENTER BICYCLE SHOP
We have a large selection of CRUISER bicycles for sale.  Shop at www.bicycledesigner.com


Lowrider Bicycle Instruction Manual - Assembly
Note:  The Classic Lowrider is our base model.  Some models like the Continental, Superwheel, and
Show Bike lowriders have additional parts which attach to the Classic lowrider.


Online at: 
http://www.bicycledesigner.com/AssemblyWEB/Lowrider/lowrider-bike-instruction-manual-assembly.htm

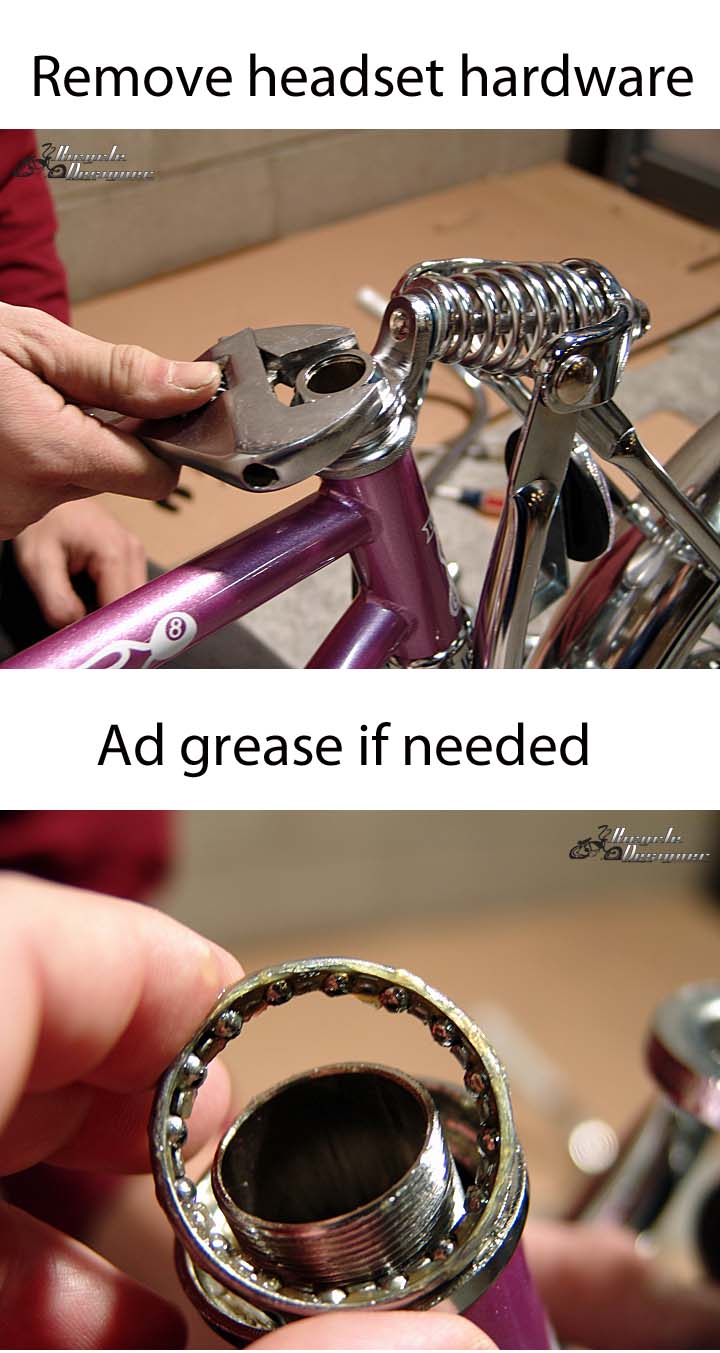
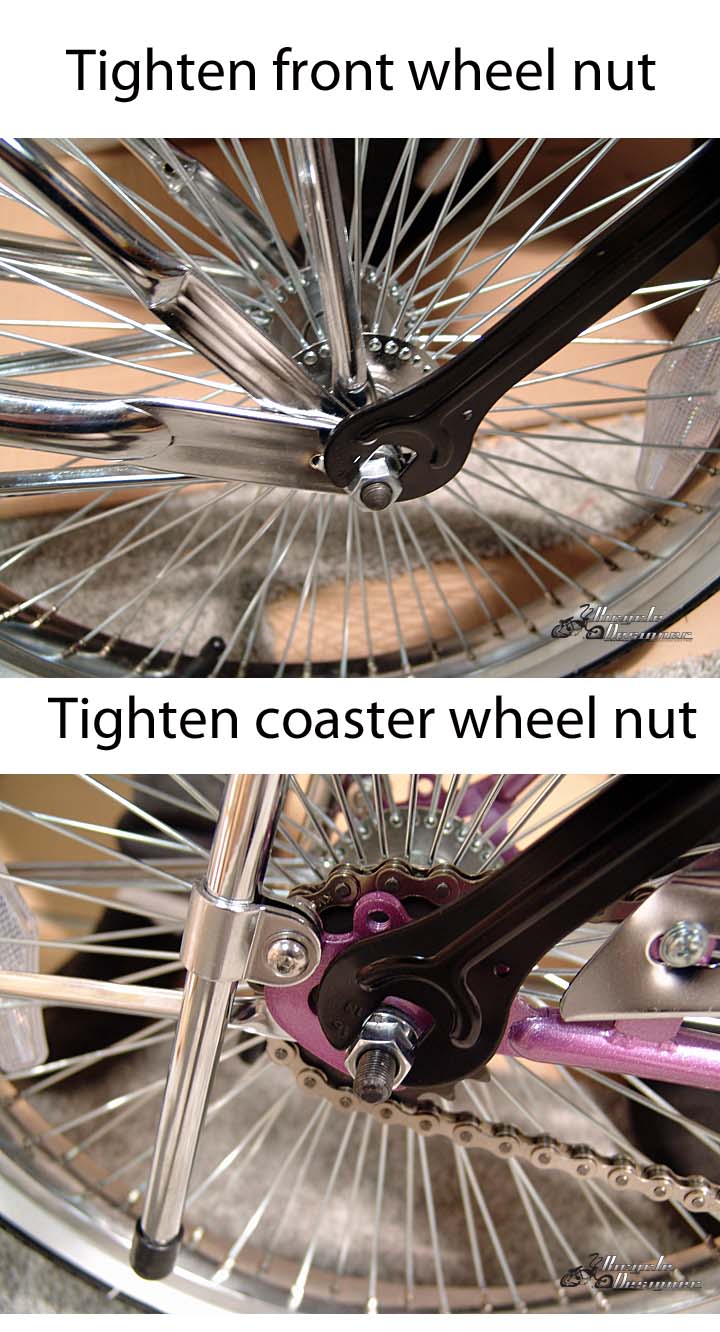
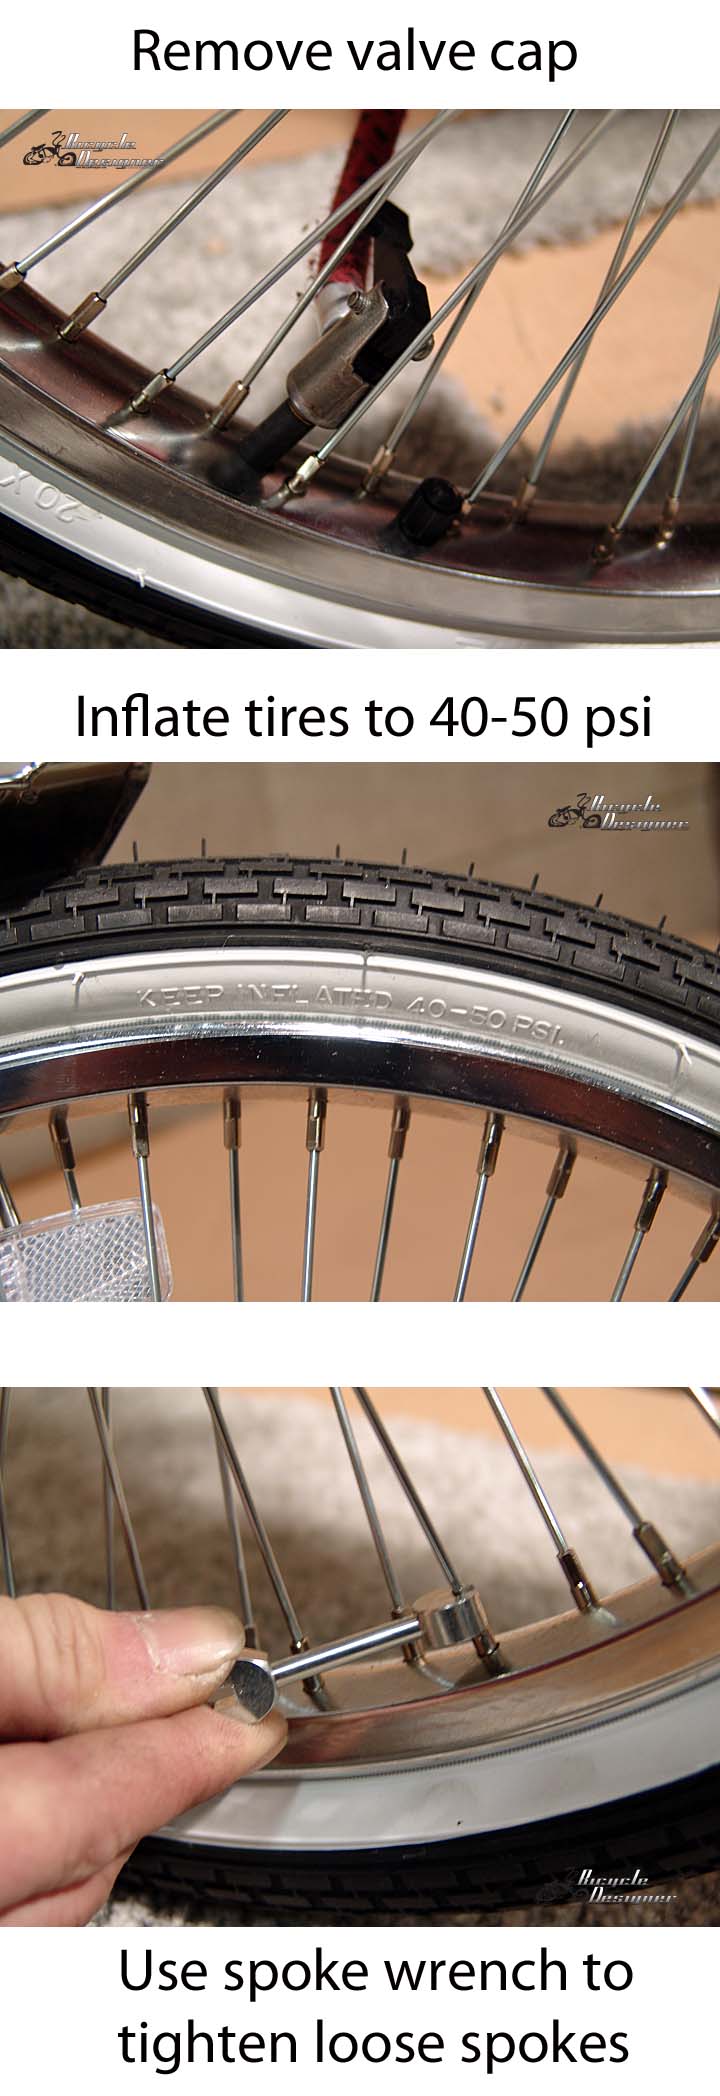
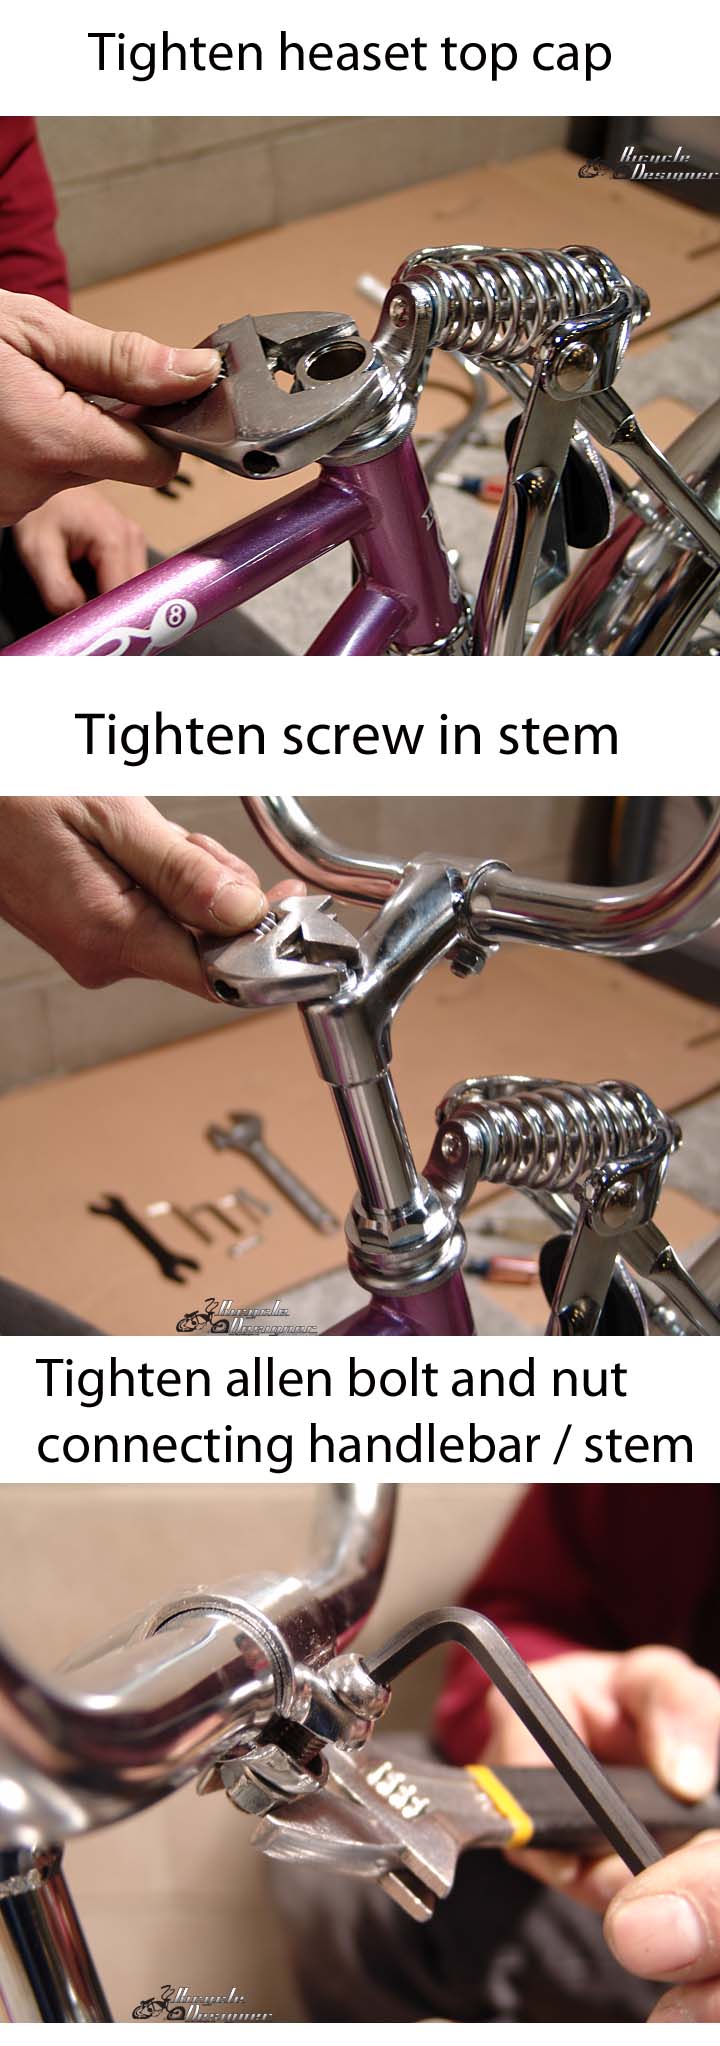
Operations & Safety instructions

Brakes – a lowrider bicycle uses a rear wheel coaster brake, which means the rear wheel has a foot brake
built into it.  To stop the bicycle simply back pedal and it will come to a stop.  There are no other gears
on a lowrider bicycle.  A front and rear hand brake may be added to a lowrider bicycle.

Riding conditions - Lowrider bicycles are for casual riding on flat surfaces or very casual slopes. 
Going up hills is difficult because the crank is only 3.5” long.  Most people enjoy their lowrider bicycle
not so much for riding, but for adding parts to make it into a show bike for entering bicycle shows or
just showing it off to friends. Although lowrider bicycles have a front, rear, and wheel reflectors,
night riding is not recommended unless it is in a flat area like a park.  Off road riding is not for lowrider bicycles.


Maintenance Instructions (tighten all nuts and screws securely.  Do not over tighten)
Coaster brake - tighten the coaster brake clamp's screw and nut using a crescent wrench and phillips head screwdriver
Crank bearings - tighten securely crank hardware or remove hardware to check grease.
Headset hardware and bearings - tighten securely headset hardware or remove the headset hardware to check grease.
Wheels - tighten securely the front and coaster wheel nuts are securely tightened on each axle.  Tighten loose spokes.
Tires - inflate tires 40-50 PSI and check for loose spokes to tighten.
Reflectors - tighten securely hardware used for front, rear, and wheel reflectors.
Handlebar - tighten securely the nut and screw which connects the handlebar to the stem.  Also tighten securely the long stem screw.
Seat - tighten securely the nut and screw under the seat.  Also tighten securely the seat post nut.
Fork - tighten securely springer fork nuts
Kickstand - tighten securely kickstand allen bolt
Pedals - tighten right side and left side pedals
Chain - check the tension of the chain, it should be tight but not too tight.  To change the tension loosen the coaster nut, set and tighten.
Fender braces - tighten all screws and nuts holding the fenders to the braces and frame.
 
© Copyright 2009 BicycleDesigner.com, Inc.